Tuesday, June 29, 2010

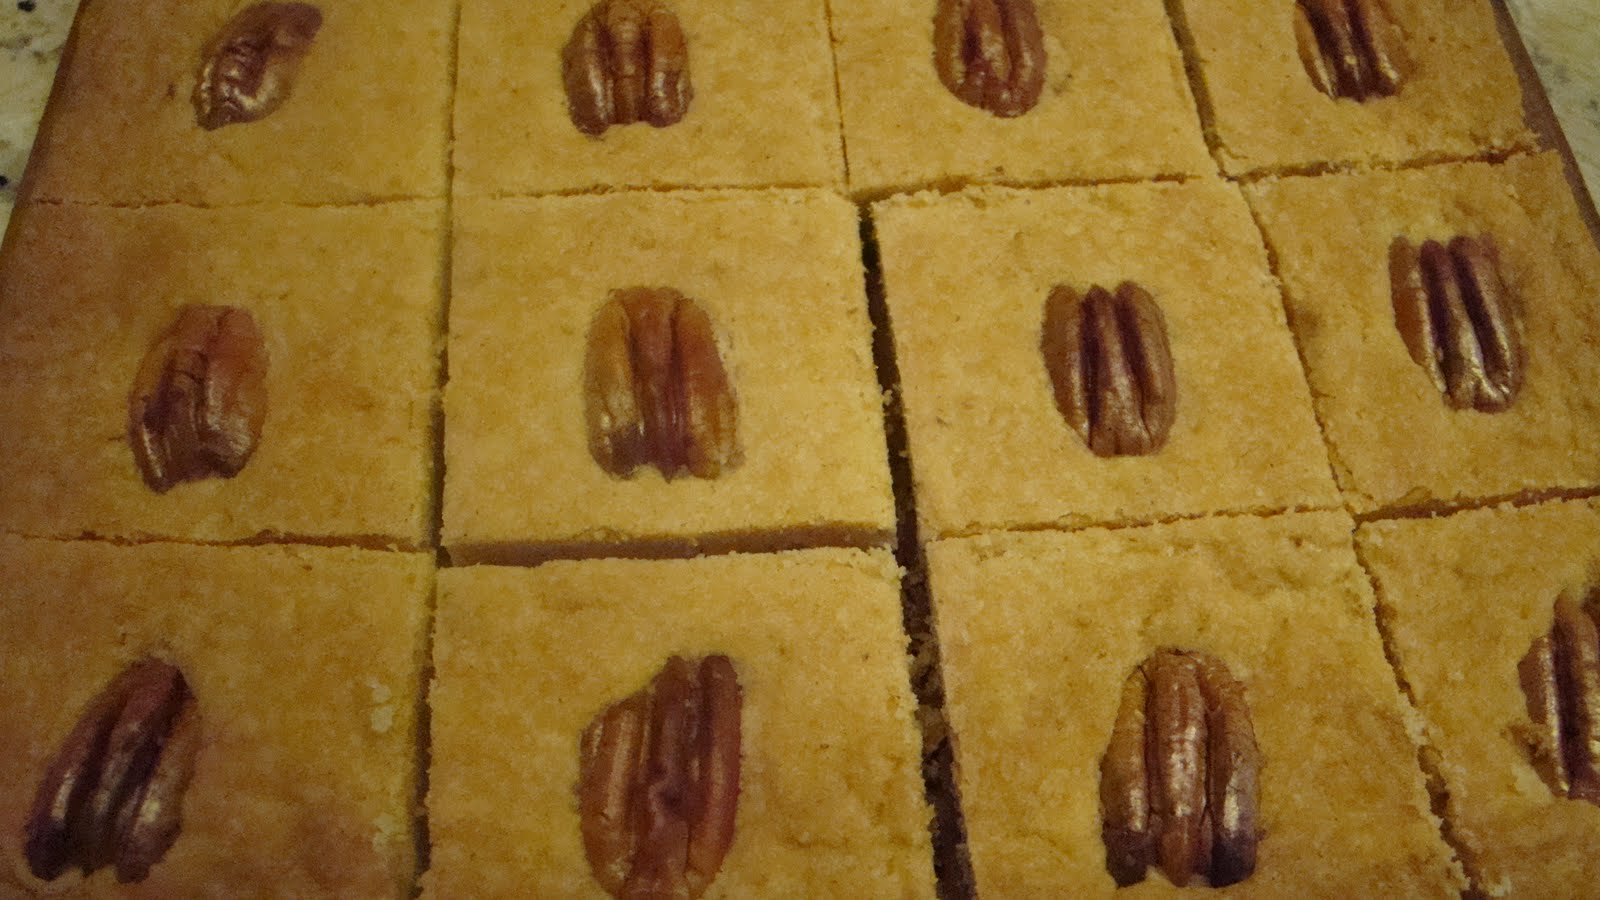
BOURBON PECAN SHORTBREAD

A friend, (a local East Carolinian) who has a pecan tree in his backyard, gave us a huge bag of pecans.  Beautiful, big North Carolina pecans.  I was happy to get such a big bag of these yummy nuts and felt that I should reciprocate by baking something nice, something using the pecans.

I don't know about you, but shortbread is one of my favorite things to eat.  It's buttery, tender and not overly sweet.  When you add pecans, you get even more of a buttery taste.  The bourbon, while a nice idea, doesn't really add anything discernible to the cookie.  You can drizzle the shortbread with melted chocolate or caramel, if you really want to take it over the top, but I like it just as it is.  So nice with a cup of tea.

Bourbon Pecan Shortbread
Adapted from allrecipes.com
Rating:  9 out of 10
PRINTABLE RECIPE


INGREDIENTS:
1/4 cup chopped pecans
1/2 cup confectioner's sugar
1/2 cup (1 stick) unsalted butter, softened
1/2 tsp. vanilla extract
1 Tbsp. bourbon
1 cup unbleached all-purpose flour, divided use
2 Tbsp. cornstarch
16 pecan halves

Heat oven to 325F.  In the work bowl of a food processor, pulse chopped pecans and sugar until nuts are ground to a fine crumb.  Add butter, vanilla and bourbon; pulse till well combined.  Add flour and cornstarch.  Pulse till mixed well.

Lightly spray an 8" square pan with non-stick cooking spray.  Turn dough out onto pan and evenly press with fingers, working from center to outside edges.  Score the shortbread with a sharp knife, cutting 3 lines in each direction to make 16 squares.  Poke the shortbread all over with a fork.

Place a pecan half on each square.  Score again if necessary.

Bake about 35 minutes (check the shortbread at 30 minutes for doneness), or till just lightly browned and set. Let cool for 10 minutes in the pan.  Loosen edges with a knife and flip the pan over onto a cutting board.  Tap lightly to loosen from pan.  Cut into serving pieces while warm.  Yield:  16 cookies

See how nicely the shortbread cuts while warm.  The scoring lines have filled in while baking, but there are still faint lines to guide you in cutting.


Be sure to try this recipe soon.  It's so delicious -- buttery, tender, and just mildly sweet.

Tuesday, June 22, 2010

GREEN PAPAYA SALAD


One of the increasingly popular menu items at Thai restaurants across the country is green papaya salad.  I first heard about this salad from a Burmese refugee living in Texas, but I was unable to find a green papaya.  Then Molly Wizenberg wrote about it in the May 2010 issue of Bon Appetit.  I tried harder to find the green papaya, but continued to strike out.  Finally, green papayas came into season and they were everywhere.  Who knew they were a seasonal item?

The salad is a perfect example of Thai food:   a beautiful balance of salty, sweet, spicy and sour flavors.   But a firm, hard, green papaya must be used.

If the papaya is at all soft, you will have a rubbery, chewy and tough salad.

I gave it to my two testers:  my hubby (a Northern transplant to the South), and Brad (a local New Bernian).  They both gave it two thumbs up, way up.  Brad says he eats everything, and Guy says he likes the sweet/hot combo of flavors.

The recipe below will make enough for two hearty appetites as a main dish, or about 6 as an appetizer.  If you make a main dish, feel free to add cooked shrimp or other seafood.   Dried shrimp, which makes a nice addition to the dressing, is available at Asian food stores.  New Bern's Asian stores are located on S. Glenburnie Road and in the Trent Road Shopping Center.

Green Papaya Salad
Adapted from Bon Appetit
Rating:  8.5 out of 10
PRINTABLE RECIPE


INGREDIENTS:
2 Tbsp. freshly squeezed lime juice
1 Tbsp. brown sugar
2-1/2 tsp. fish sauce
dash lite soy sauce (or 1-1/2 tsp. finely chopped dried shrimp)
1 garlic clove, minced (1 tsp.)

10 green beans, cooked till crisp-tender, julienned
2 cups finely shredded green papaya
6 cherry tomatoes, quartered
1/4 cup chopped fresh cilantro
2 green onions, sliced lengthwise in slivers
2 tsp. minced Thai pepper or jalapeno
3 Tbsp. chopped honey-roasted peanuts

Prepare the dressing:  Whisk the lime juice, sugar, fish sauce, soy sauce (or dried shrimp) and garlic in a small bowl.  Set aside.

If you have a julienne peeler, use it to shred the papaya.  Otherwise, use the Thai method of shredding:  peel the papaya, then carefully using a very sharp heavy knife, hit the papaya with lengthwise strokes, making gashes down the flesh.

Then take a vegetable peeler and peel the strips.

This should give you long, thin strips of papaya.


Place 2 cups of shreds into a medium bowl.  Add tomatoes, cilantro, green onions, chile pepper and green beans.  Toss.  Refrigerate till ready to serve.  Before serving, pour dressing over salad; toss.  Sprinkle peanuts over top.

Monday, June 14, 2010

ROASTED PEACH BUTTER SPICE CUPCAKES


When we lived in New Jersey we had an abundance of local fruits and vegetables every summer.  Besides our own home garden, there were lots of produce stands filled with local fresh produce.  White peaches went fast, because they had the best flavor and texture, so I was always sure to get to my favorite stand early to get some.  I haven't found good white peaches in East Carolina yet, but the local peaches are pretty good.  I usually pass on the out-of-state ones that come here first, and wait for local fruit to ripen.

Last year, I filled up my freezer with peaches because they were just so outstanding.  When I tried to make a peach pie with the frozen peaches, though, I was disappointed to find that they were mushy.  So Plan B went into action:  make peach butter.  But the thought of stirring all those peaches forever in a pot turned me off.  So I decided to try roasting the peaches in the oven.  Not only was it easy, but also delicious.  The flavor of the peaches was intensified by the long, slow roasting and the end result was a richly flavored peach butter.

I heartily recommend this method.  You can use it with fresh or frozen peaches.  Peach butter is delicious on bread, toast, biscuits or rolls.  It's fat-free and loaded with flavor, and my version uses a lot less sugar than a typical recipe would.  Of course, after you make the peach butter, you can then make these delicious cupcakes.  Well, what are you waiting for?

Roasted Peach Butter
Source:  The Bear Cupboard
Rating:  10 out of 10
CLICK FOR PRINTABLE RECIPE
INGREDIENTS:
8 cups sliced fresh or frozen peaches, with juice
6 Tbsp. granulated sugar (I used 2 Tbsp. sugar + 1-1/2 tsp. Nu Naturals Liquid Vanilla Stevia)
1/4 cup dark corn syrup (or honey or agave nectar)
1/4 cup frozen apple juice concentrate, thawed

Heat oven to 375F.  Combine all ingredients in large roasting pan and bake 1-1/2 to 2 hours, or till peaches are caramelized and excess liquid evaporates.  Cool slightly.  Puree warm peaches in batches in blender or food processor.  Yield:  about 1-1/2 to 2 cups peach butter.

Roasted Peach Butter Spice Cupcakes
Source:  The Bear Cupboard
Rating:  8.5 out of 10
CLICK FOR PRINTABLE RECIPE
INGREDIENTS:
1/2 cup + 2 Tbsp. white whole wheat flour
1/2 cup unbleached all-purpose flour
1 tsp. baking soda
1/2 tsp. cinnamon
1/4 tsp. sea salt
1/4 tsp. nutmeg
1/4 tsp. cloves
1/4 tsp. finely grated lemon zest, packed
1/2 cup + 2 Tbsp. granulated sugar
1/3 cup Smart Balance 50/50 butter blend (or butter, if preferred)
1 large egg
3/4 cup peach butter, homemade or store purchased, + 3/4 cup to swirl with frosting
1/4 cup milk
1/2 cup raisins
1/4 cup toasted broken (or chopped) walnuts

Heat oven to 350F.  Place paper liners in a 12-cup muffin tin.  In medium bowl, whisk together flours, baking soda, cinnamon, salt, nutmeg, cloves and lemon zest.

In large bowl, cream together sugar and butter blend.  Beat in egg.  On low speed of electric mixer, add the dry ingredients alternately with the peach butter and milk, beginning and ending with dry ingredients.  Stir in raisins and nuts.  Divide batter evenly among baking cups, using about 1/4 cup for each.  Bake 20-25 minutes, or till a toothpick inserted near center returns almost clean.  Transfer to wire rack to cool completely.
Frost with cream cheese frosting (recipe below) and swirl about 1 Tbsp. peach butter through frosting of each.  Yield:  12 cupcakes

Cream Cheese Frosting
Source:  The Bear Cupboard
Rating:  10 out of 10
INGREDIENTS:
1 stick unsalted butter, softened
Big pinch of sea salt
2 cups powdered sugar
2 tsp. vanilla powder, or vanilla extract
8 oz. cold Neufchatel cheese or cream cheese, cut into 8 pieces.

In medium bowl, cream butter, salt, sugar and vanilla till very smooth, about 5 minutes.  Beat in 1 piece of cream cheese at a time,  beating on medium high after each addition till very smooth, about 2 minutes each. This frosting requires a lot of beating, but the end result is a super-creamy and delicious frosting.

Now let me tell you about the Nature Valley Chewy Trail Mix Fruit and Nut Bars Giveaway on Nanbon's Corner. You might win a case of granola bars plus a $25 gift certificate to Sam's Club. Get right over there and sign up because the deadline of June 21 is looming.

Wednesday, June 2, 2010

BLUEBERRY CHEESECAKE BARS

Blueberries, a popular item throughout our state, are one of North Carolina's state symbols. When I lived in the Garden State (New Jersey), I grew my own blueberries. Just two bushes produced all our family needed for the year, with enough to give away to friends and neighbors. But I didn't plant blueberry bushes when we moved to New Bern because our development is a bird sanctuary. We are loaded with birds, and I love them all. I didn't want to fight them to get to the fruit. And, anyway, it's pretty easy to get blueberries around this town. There are farms nearby where you can pick your own, like Nelson's in Bridgeton, a short 10-minute ride. Grocery stores carry local produce, including blueberries, or you can buy from the farm stands that are scattered throughout our area. The farm stand on Lowe's Boulevard has blueberries from Nelson's at the best price I've seen anywhere. So there's no shortage of these wonderful little blue balls of nutritional sweetness.

I've found a super-easy dessert you can make with your blue gems. Blueberry Cheesecake Bars are light and luscious, a great party dessert. They're easy to pick up and eat, no need for fork and knife. They stay together, don't crumble easily, and are easy to get out of the pan. I love the intense blueberry flavor. Really, you must try these soon.

Blueberry Cheesecake Bars
Adapted from kraftfoods.com
Bear Rating:  9.5 out of 10
PRINTABLE RECIPE
INGREDIENTS:
6 Tbsp. butter, melted
1 cup graham crackers
1 cup almonds
2 pkg. (8 oz. each) Philadelphia brand Neufchatel cheese
3/4 cup sugar
2 large eggs
1 tsp. vanilla powder (or vanilla extract)
1/8 tsp. almond extract (optional)
1 jar (10 oz.) Wild Maine Blueberry Preserves (or plain blueberry preserves)
1-1/4 cups fresh blueberries

Heat oven to 350F.  In work bowl of food processor, pulse almonds and graham crackers till finely ground.  Pour melted butter into a 13x9-inch baking pan.  Pour almonds and graham crackers over top.  Mix together with a spatula.  This is about as easy as it gets.
 Press firmly onto bottom of pan.  Refrigerate till ready to use.
Wipe out work bowl of food processor with damp paper towel.  (It doesn't have to be perfect.)  Combine Neufchatel cheese and sugar in work bowl and pulse till combined and creamy, scraping down sides as needed.  Add eggs, one at a time, pulsing till combined after each addition.  Add flavorings and pulse till combined.  Making cheesecake in a food processor is super easy.
Stir preserves in jar till softened (if necessary, nuke briefly to soften).  Spread preserves evenly over chilled crust.  Sprinkle blueberries over preserves.

Top evenly with cream cheese mixture.  The cream cheese mixture will just barely cover the berries.  In fact, the larger berries will be peeking out at you.  Bake about 30 minutes, or until slightly puffed on the edges.  Cool completely in pan on wire rack.  Cut into 4 rows by 6 rows for 24 bars (roughly 2-1/4" each), or 5 rows x 7 rows for 35 bars (roughly 1.8" each).  Store leftovers covered in fridge.

Look at how beautifully the first slice came out of the pan.  No crumbles, no mess.
These are so delicious.  Everyone loved them.  Two thumbs up, way up!

Tuesday, May 25, 2010

GRILLED FISH TACOS


On our recent trip to San Diego, we discovered Ocean Beach, where fish tacos are grilled, not fried.

Ralph Rubio, an American who discovered fish tacos when he visited Baja California in Mexico in 1982, was the first to bring them to the U. S.  Rubio's, the U. S. home of the fish taco, is all over southern California.  In San Diego, where US fish tacos originated, they are almost as easy to find as in coastal Mexico where they are sold by street vendors on virtually every street and in most restaurants.  In fact -- forget the Big Mac -- San Diego's signature fast-food dish is fish tacos.  And why not?  They're cheap, fast and really good.  Nowadays you can also find fish tacos inland in Colorado, Arizona, Nevada and even 3000 miles away in coastal New Bern.   But you can't easily find grilled fish tacos, which is the version we discovered in Ocean Beach.  With no Mexican chain restaurants to dictate, Ocean Beach has perfected the fish taco.  Their locally owned and operated small eateries offer reasonably priced and very good food.  And their fish tacos are to die for.

We came home with a hunkering for Ocean Beach-style fish tacos, and I was out to duplicate them.   While mine didn't taste identical to what we ate in Ocean Beach, it didn't matter.  These are so delicious, we've eaten them often since we returned home and have savored every bite.  You can make them with whatever fish you have.  I've used Tilapia, Grouper, Cod and fresh-caught (by my hubby) Spanish Mackerel, and they were all wonderful.  Serve these with black beans and yellow rice (or coconut rice), and you've got a very substantial and memorable meal.  Skip the fish taco offerings in New Bern's chain Mexican restaurants and make this version instead.  You'll save money and calories, help your cholersterol count, and -- most importantly -- you'll have a meal you won't soon forget.


Grilled Fish Tacos
Inspired by Le Bistro Restaurant, Ocean Beach, California 
Rating:  10 out of 10
PRINTABLE RECIPE


SHORT-CUT CHIPOTLE RANCH DRESSING (WHITE SAUCE):  
1 cup bottled Ranch dressing
1/4 cup freshly squeezed lime juice
1/2 tsp. dried chipotle chile powder (or 1 tsp. minced chipotle chile in adobo sauce from can)
1/2 tsp. ground cumin
1 Tbsp. finely chopped fresh cilantro


MARINADE:  1/4 cup freshly squeezed lime juice
Zest of one lime
3 Tbsp. olive oil
1 tsp. grated or minced fresh garlic (about 1 clove)
1/2 tsp. sea salt
1/8 tsp. black pepper

FISH:  1-1/2 lbs. fish of choice (e.g., trout, tilapia, grouper, cod, Mahi Mahi, Spanish mackerel)

ACCOMPANIMENTS:  
About 8 flour or corn tortillas, 5" size
About 1 to 1-1/2 cups finely shredded fresh cabbage
About 1 to 1-1/2 cups chopped avocado (or guacamole)
About 1 cup salsa of choice (or chopped fresh tomatoes)
About 1/4 to 1/2 cup of finely grated Cotija cheese, or other mild Mexican or
American cheese (You can also use cheddar, Monterey Jack or Havarti cheese)
About 1/2 cup chopped cilantro
Lime quarters or slices

METHOD:  
1. In small bowl, combine dressing ingredients.  Sauce will be thin.  Cover.  Chill.

2. In quart or gallon-size plastic resealable bag, combine all marinade ingredients.  Massage well to distribute ingredients.  Add fish.  Seal bag.  Refrigerate up to 2 hours.

3.  Heat gas or charcoal grill to medium hot (about 400F).  (Season grates by rubbing with paper towel folded over several times and held by tongs, then dipped into vegetable oil.)  While grill is heating up, set out all the accompaniments and the sauce.  Place fish directly on grates and grill several minutes on each side, or till fish flakes easily with fork.  Transfer fish to plate and cover to keep warm.  Grill tortillas about 10-15 seconds each side, just enough to warm and soften them.  Place them in tinfoil to keep warm.

4.  Cut fish into serving pieces and place in bowl or dish.  Let everyone make their own fish taco, adding the accompaniments they want.

Serve with black beans and rice or enjoy the tacos by themselves.


Sunday, April 11, 2010

FARMER'S MARKET, TRYON PALACE AND VANILLA CUPCAKES WELCOME SPRING,

New Bern was a bustle of activity this weekend.  On Saturday, the Farmer's Market opened with more than 50 vendors serving a huge crowd of patrons.
For the first time, children's activities were available (making pottery, beaded bracelets or planting seeds in a take-home pot).  Weaving instructions were available from weaver Kay Lannoye, dressed in period costume.

No one could possibly go hungry with all the wonderful baked goods available.  


A limited number of vegetables were for sale, but plenty of crafts.  R Garden had vegetables and garden "poop" for sale (goat  manure supposedly good for growing anything without the usual manure odor).  


Tryon Palace opened its grounds free of charge for the weekend.  A sale of heritage plants and trees was a big attraction, but the beautiful flowers were also a draw for visitors.  Cheerful pansies greeted me as I began my walk towards the formal gardens.

Raised beds were filled with dainty irises and purple flowers that I didn't recognize.

The irises were lovely shades of pale blue, white and yellow.
A pink carpet of flowers enticed me through the entrance to another, more formal setting with statues.


Just as I was reveling in the glorious shades and shapes of so many lovely flowers,
my camera battery went dead.  So sad, there was much more to photograph, and I so wanted to share it all with you.  Please do visit the Palace soon and see the gardens for yourself.  And take a guided tour of the inside as well.  It is so worth it.  I could go every week, as I never tire of hearing about New Bern's early history and seeing the interior of such a lovely building.

When I got home, the Palace gardens were still on my mind, so I baked up some cupcakes and topped them with pansies from my garden.


Vanilla Cupcakes
Source:   Southern Living, March 2009 
Rating: 10 out of 10


Click for PRINTABLE RECIPE

INGREDIENTS:
2 cups sugar
1 cup (2 sticks) butter, softened
3 large eggs, room temperature
1 tsp. vanilla + 1 tsp. vanilla powder (or 2 tsps. vanilla)

1/4 tsp. almond extract
3 cups cake flour (I used White Lily all-purpose.)
1-1/2 tsp. baking powder
¼ tsp.  salt
1 cup buttermilk (or 1 cup milk + 1 Tbsp. vinegar or lemon juice)

Heat oven to 350F.  Place baking cups in 24 muffin tin wells; spray with non-stick cooking spray; set aside.


In medium bowl, beat sugar and butter with electric mixer using medium speed, until creamy and fluffy, about 3 minutes. Add eggs, one at a time,  and beat till yellow disappears.  Beat in flavoring. In small bowl, whisk together flour, baking powder and salt; add to wet mixture alternately with buttermilk, beginning and ending with flour mixture. Beat at low speed just until blended after each addition. Batter will be thick. Spoon batter into cups, filling ¾ full. 


Bake 18-22 minutes, or till a toothpick inserted in center of cupcake returns with just a few crumbs. Cool in pans on wire rack 10 minutes; remove from pans to wire rack and cool completely (about 1 hour). Spread with desired frosting. Yield: 24 cupcakes  Frost with your favorite frosting, or make some wonderful Vanilla Cream Cheese frosting..  And don't forget the pansy!


NOTES:  
1. Please sift the flour before measuring.
2. Please use cake flour or White Lily all-purpose flour for best results.
3. Don't over-mix the batter and don't beat at too high a speed.
4. Don't over-bake the cupcakes.  
5. Refrigerate leftover cupcakes if using cream cheese frosting.

Tuesday, April 6, 2010

PAULA DEEN'S PINEAPPLE CASSEROLE


We ate Easter dinner with our friends, Dale and Ed, in their Topsail home.  Dale and Ed are long-time New Bern residents and still maintain a residence in River Bend, though they mainly live in Topsail now.  Dale moved here from Ohio and owned and operated Pac 'n Ship on Glenburnie Road until she retired.  Ed, a local New Bernian, was a higher-up in BB&T before retirement.  Now they watch the beautiful ocean from their beachfront home when they're not pursuing other hobbies.

A wonderful spiral-cut ham was the centerpiece of our meal, and flavorful sides completed it in style.  Everything was delicious, but the pineapple casserole grabbed my attention.  Dale informed me that the recipe came from Paula Deen, well-known southern cook.  This must be a Savannah dish, because Ed said he had never seen or heard of it before now.  The dish calls for a good amount of sugar, but Dale substitutes Splenda, since Ed is diabetic.  She also uses pineapple tidbits instead of chunks.   And there really is no better accompaniment for ham than this sweet pineapple dish.  The cheese tempers the sweetness without overpowering the other flavors.  In fact, I didn't know there was cheese in the dish till Dale told me.  This is one recipe I will keep for future ham dinners, and I hope you will, too.

I brought the dessert -- a mixed berry pie with a Limoncello pie crust that I named "Antioxidant Pie." I'll be posting the recipe for this delicious pie on my Judy's Kitchen blog soon.

Paula Deen's Pineapple Casserole
Bear Rating:  9 out of 10
PRINTABLE RECIPE


  • 1 cup sugar (or sugar substitute)
  • 6 tablespoons all-purpose flour
  • 2 cups grated sharp cheddar
  • 2 (20-ounce) cans pineapple chunks (or tidbits), drained, and 6 tablespoons pineapple juice reserved
  • 1 cup cracker crumbs (recommended: Ritz)
  • 8 tablespoons (1 stick) butter, melted, plus extra for greasing pan

Directions

Preheat the oven to 350 degrees F.
Grease a medium-size casserole dish with butter.
In a large bowl, stir together the sugar and flour. Gradually stir in the cheese. Add the drained pineapple chunks, and stir until ingredients are well combined. Pour the mixture into the prepared casserole dish.
In another medium bowl, combine the cracker crumbs, melted butter, and reserved pineapple juice, stirring with a rubber spatula until evenly blended. Spread crumb mixture on top of pineapple mixture. Bake for 25 to 30 minutes, or until golden brown.


Bookmark and Share